
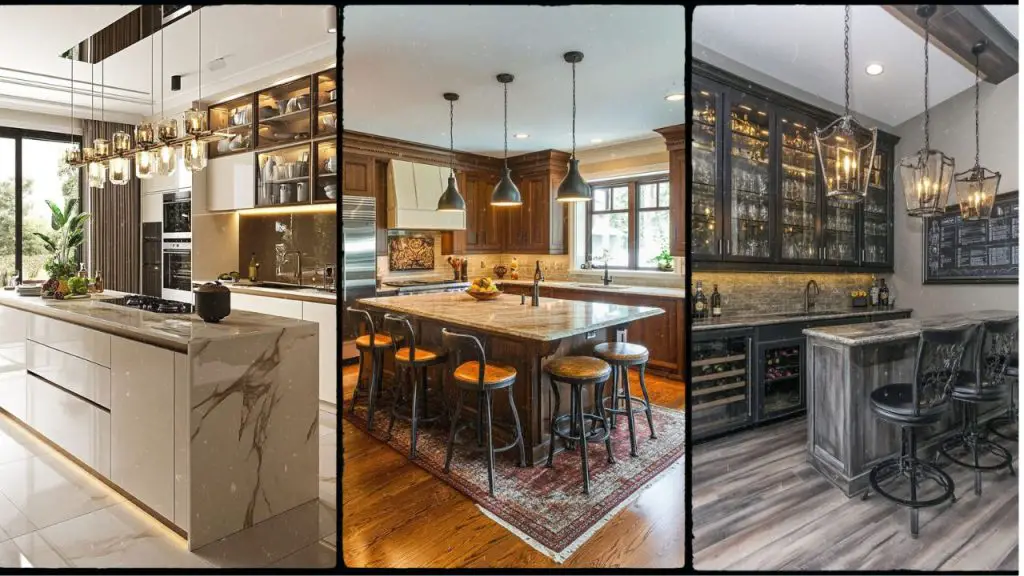
A well-designed kitchen peninsula can be your food prep station, casual dining spot, and storage space – all in just 60 to 90 inches. Pretty amazing, right? Your kitchen peninsula packs incredible versatility, especially when you have limited space where every inch matters.
planning makes all the difference – from picking the right storage to adding comfortable seating. Modern peninsula designs come with cool features too. Built-in wine racks and strategic pendant lights boost both function and style.
Want to make the most of your kitchen space? This piece walks you through expert tips and essential dos and don’ts. You’ll learn everything needed to create the perfect peninsula setup. Let’s make your kitchen peninsula the true heart of your home!
Assessing Your Kitchen for a Peninsula

You need a full picture of your kitchen’s space and traffic patterns to create a functional peninsula design that boosts your kitchen experience.
Measure available space and traffic flow
Precise measurements are the foundations of a successful kitchen peninsula. Kitchen experts say you should keep at least 42 inches between your peninsula and other counters or appliances. The space should increase to 48 inches if you cook with others to avoid crowding. Walkways outside work areas need a minimum of 36 inches.
Your kitchen’s traffic pattern needs attention. The kitchen work triangle that connects your sink, refrigerator, and stove should follow these rules:
- All three legs combined should not exceed 26 feet
- Each leg should be between 4 and 9 feet
The peninsula placement should not disrupt this vital triangle. A well-laid-out peninsula can guide traffic away from busy work zones, unlike islands that might create bottlenecks.
Your appliances need enough clearance too. Dishwashers, refrigerators, and ovens should open without any obstacles.
Compare peninsula vs island for your layout
| Feature | Peninsula | Island |
|---|---|---|
| Attachment | Connected to wall/counter on one side | Freestanding with four available sides |
| Space Required | Less; only needs clearance on three sides | More; requires circulation space on all sides |
| Kitchen Size Suitability | Ideal for small to medium kitchens | Better for larger kitchens |
| Seating Capacity | Typically accommodates up to 3 people | Usually seats 4 or more |
| Storage | May have “blind cabinet” at 90° angle | No dead zones, more accessible storage |
| Design Adaptability | Less flexible, should match existing cabinetry | More versatile, can create contrasting design |
Peninsulas work better in smaller kitchens. They extend from an existing wall or counter and need less space than islands. A peninsula can reshape a galley or straight kitchen into an L-shaped layout. This creates extra workspace without taking up too much floor area.
Islands need 42-48 inches of clearance on all sides. This makes them impractical for compact spaces. A peninsula might be your best choice if your kitchen is less than 13 feet wide.
Start by assessing your household’s needs. Ask yourself if you cook alone or with others. Storage might be your top priority. Next, take honest measurements of your kitchen. Getting the right measurements now helps you avoid design choices that get pricey later.
Designing the Right Peninsula Layout
A kitchen peninsula layout can turn your cooking space from basic to amazing. Each design brings its own benefits that depend on your kitchen’s size and layout.
L-shaped
L-shaped peninsulas work great in smaller kitchens. They create a practical work triangle and make the space feel open. The layout extends from your existing cabinets at a right angle that splits cooking areas from dining spaces. This design shines when you want to upgrade from a straight-line kitchen to something more practical.
U-shaped

U-shaped peninsulas give you the most cabinet space by using three walls with a peninsula that extends from one end. This creates a horseshoe pattern that puts everything within reach. Home cooks love this setup because appliances and storage are easy to access from anywhere. The design works wonders in open-concept homes by separating kitchen areas from living spaces without blocking the view.
Straight Peninsula
Straight peninsulas stretch out directly from a galley kitchen wall. They create an L on one side and an I on the other. This simple design saves space in smaller kitchens where every inch counts.
Ideal dimensions and overhangs for seating
The perfect kitchen peninsula runs between 60-90 inches long. Its depth should match your current countertops—usually 24-36 inches. You’ll need a 12-18 inch overhang for comfortable seating. A 12-inch overhang won’t let bar stools slide all the way under, so go with 18 inches if that’s what you want.
Any overhang bigger than 12 inches needs extra support like decorative corbels, columns, or brackets to stay level. The space between the seat and counter bottom should be 15 inches to give enough room for knees.
Table: Common Peninsula Layouts and Their Pros/Cons
| Layout Type | Best For | Pros | Cons |
|---|---|---|---|
| L-shaped | Small-medium kitchens | Creates efficient work triangle; Defines separate zones; Adds storage | 90° corner creates difficult-to-access cabinet storage |
| U-shaped | Medium-large kitchens | Maximizes counter space; Creates defined cooking zone; Offers ample storage | Can feel enclosed in smaller spaces; Potentially inefficient in larger kitchens |
| Straight | Narrow/galley kitchens | Simple design; Makes efficient use of limited space | Limited counter extension; Fewer seating options |
Your kitchen’s size and how you plan to use it should guide your choice of peninsula layout.
Smart Storage and Seating Solutions
Your kitchen peninsula can become a functional powerhouse with smart storage solutions and cozy seating that makes the most of available space.
Cabinet configurations for storage
Smart cabinet placement on both sides will make your peninsula work harder. Deep drawers for pots and pans work best on the kitchen side. The outer side can feature shallow cabinets or open shelving that displays items you use less often. Rotating shelves in corners help eliminate unused space.
Smart peninsula storage options include:
- Pull-out organizers and cutting boards
- Built-in trash bins and paper towel holders
- Wine racks or specialized beverage areas
- Vertical dividers for baking sheets and trays
A narrow peninsula might work better in tight spaces – just wide enough for a countertop with minimal storage underneath. You could also use the area under the island to store holiday dishes or flower vases, which frees up your everyday cabinet space.
Incorporating hidden appliances
Hidden appliances give your kitchen a smooth, luxurious appearance. Here are some smart integration options:
| Appliance | Placement Tip | Benefit |
|---|---|---|
| Dishwasher | Kitchen side | Easy access to dirty dishes |
| Microwave drawer | Available from either side | Frees counter space |
| Wine/beverage fridge | Outer edge | Creates entertainment zone |
| Small appliance garage | Behind cabinet doors | Hides toasters, blenders, coffee machines |
Your kitchen will look more cohesive when appliance panels match the cabinetry. This trick works great with refrigerator drawers and dishwashers.
Choosing bar stools for comfort and fit
The right stool height makes all the difference. Standard 36-inch counter-height peninsulas need stools between 24-26 inches tall (measured from floor to seat). You’ll want 9-12 inches between the seat and countertop so your knees fit comfortably.
This simple formula helps with spacing: Counter Length ÷ (Stool Width + 6) = Number of Stools. Each person should have at least 24 inches of space.
Your lifestyle should guide your stool selection:
- Families with children: Avoid swivels; choose styles with backs
- Entertaining focus: Swivel stools allow easy conversation
- Small spaces: Backless designs tuck completely under counters
- Daily dining: Upholstered seats offer extended comfort
The perfect match between your stool height and peninsula ensures both comfort and visual appeal.
Avoiding Common Design Mistakes
Kitchen peninsula projects can run into design problems even with the best planning. You can save time, money, and avoid frustration by spotting these potential risks early.
Don’t block walkways or work zones
Your peninsula needs proper clearance to function well. The National Kitchen & Bath Association suggests 36-48 inches between your peninsula and opposing cabinets. High-traffic areas should have 42-48 inches of space.
| Area Type | Minimum Clearance | Ideal Clearance |
|---|---|---|
| Work zones | 36 inches | 42 inches |
| High-traffic pathways | 42 inches | 48 inches |
| Seating areas (no walkway) | 32 inches | 36 inches |
| Seating with walkway | 44 inches | 48 inches |
Your appliance doors need room to open completely. Dishwashers, refrigerators, and ovens need extra space beyond the simple walkway measurements. The peninsula should not disrupt the kitchen work triangle that connects your sink, refrigerator, and stove.
Avoid multi-level countertops unless needed
Multi-level peninsula designs might look stylish but often create problems. These designs:
- Break the visual flow in open kitchens
- Make cleaning harder
- Create awkward conversation distances (deeper than 1.05m)
- Reduce usable workspace
In spite of that, multi-level designs work well when you need to:
- Keep kitchen mess hidden from adjacent living spaces
- Set up separate zones for cooking and dining
- Add visual interest to an otherwise flat design
A two-tier design needs proper dimensions—standard overhangs should extend at least 38 cm deep for comfortable seating.
Keep design cohesive with the rest of the kitchen
Your peninsula should feel like it belongs in your kitchen, not stick out like a sore thumb. Here are some ways to create cohesion:
The peninsula’s materials should match your main cabinetry. Most designers use similar countertop materials throughout. Cabinet styles and hardware should line up for visual flow. The peninsula’s design should complement adjacent spaces, especially in open-concept homes.
Small kitchens benefit from curved edge countertops that soften lines and create an inviting feel. This design choice maintains cohesion while adding subtle character to your space.
Conclusion
Kitchen peninsulas are a great way to get more from your limited kitchen space. A well-planned peninsula can become your kitchen’s heart where you cook, eat and entertain guests.
Here’s what makes a peninsula work:
| What You Need | How to Do It |
|---|---|
| Space Assessment | Maintain 42-48 inches clearance around work zones |
| Layout Selection | Choose based on kitchen size and workflow needs |
| Storage Solutions | Use both sides of peninsula to save space |
| Seating Comfort | Allow 24 inches per person, proper stool height selection |
Your peninsula project should begin with space measurements and traffic flow analysis. The layout should match your kitchen’s design and meet your storage and seating requirements. Watch out for blocked walkways or disrupted work triangles.
A kitchen peninsula can transform your space completely. The right design boosts both function and style. Your new peninsula will serve as a practical workspace and add value to your home naturally.
FAQs
Q1. What are the key advantages of a kitchen peninsula? A kitchen peninsula offers versatility by serving as a food prep station, casual dining area, and storage space. It’s particularly beneficial in smaller kitchens where space is limited, as it can create additional workspace without consuming excessive floor area.
Q2. How much clearance is needed around a kitchen peninsula? For optimal functionality, maintain at least 42 inches of clearance between your peninsula and other counters or appliances. In high-traffic areas or kitchens where multiple people cook, aim for 48 inches of clearance to prevent crowding.
Q3. What are the ideal dimensions for a kitchen peninsula? A typical kitchen peninsula measures between 60-90 inches in length, with standard depths matching existing countertops (usually 24-36 inches). For comfortable seating, incorporate an overhang of 12-18 inches, with 18 inches being ideal if you want bar stools to tuck completely underneath.
Q4. How can I maximize storage in my kitchen peninsula? Utilize both sides of the peninsula for storage. On the kitchen side, install deep drawers for pots and pans. On the outer side, add shallow cabinets or open shelving for display items. Consider specialized solutions like rotating shelves for corners, and incorporate pull-out organizers, built-in trash bins, or wine racks to maximize functionality.
Q5. What should I consider when choosing bar stools for my peninsula? Select bar stools based on the height of your peninsula. For standard 36-inch counter-height peninsulas, choose stools between 24-26 inches tall (measured from floor to seat). Allow 24 inches of space per person and ensure 9-12 inches between the seat and countertop for comfortable knee clearance. Consider your lifestyle when selecting stool style, such as opting for designs with backs for families with children.